
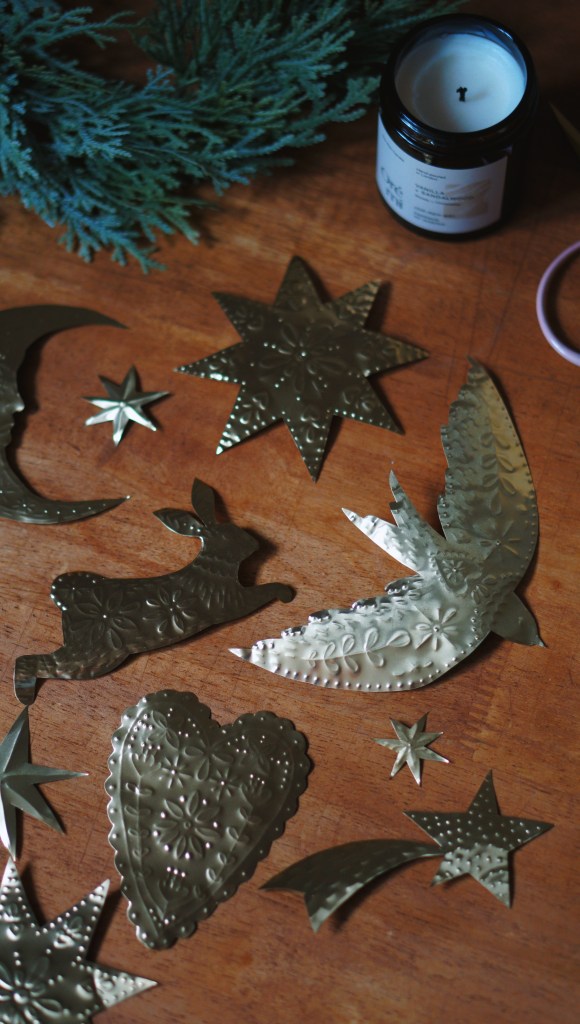
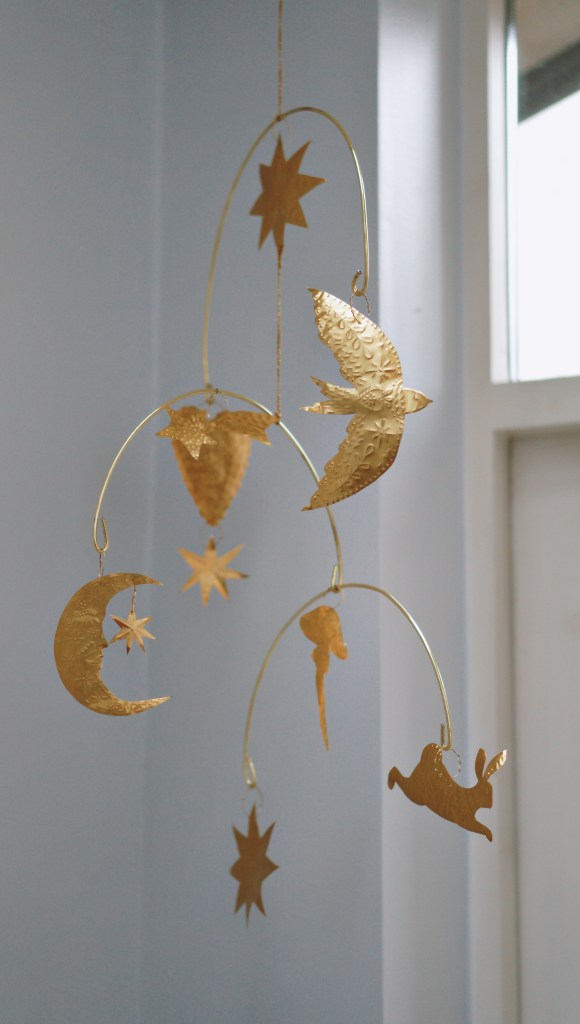
This year, I set out to create something special for the holiday season. I love decorating, but I wanted something that didn’t feel “too Christmassy,” something that could stay up long after December without looking out of place. I decided to make a gold-embossed mobile, featuring stars, moons, and little animals that reflect my love for nature. This was a labor of love, a project that took time and care, but it turned out to be one of my favorite creations—something I could see becoming part of our home year-round. Download the FREE TEMPLATES here!

If you’re ready to try this yourself, I’m here to share the process, from picking out shapes to embossing and assembling the mobile. The best part? You can also download free templates to help you get started with similar shapes and designs! Grab a cup of tea, settle in, and let’s get crafting!
Why I Chose a Mobile
I know it sounds a little unusual as a holiday decoration, but I’ve always loved mobiles. There’s something so calming about their gentle movement, and they add a touch of whimsy and wonder. Instead of sticking to traditional ornaments or garlands, I thought, “Why not a mobile?” I could imagine it catching the morning light in our living room or even hanging in my new craft studio, softly swaying.
And I love the idea of making something that feels festive but isn’t limited to one season. My hope was to create a piece that felt magical during the holidays but also brought warmth and beauty to our home all year long.
Materials Needed
To create a mobile like this, you’ll need the following materials:
- Brass sheet (for embossing, I got mine from Sostrene Grene)
- Embossing tools (embossing stylus or embossing pens)
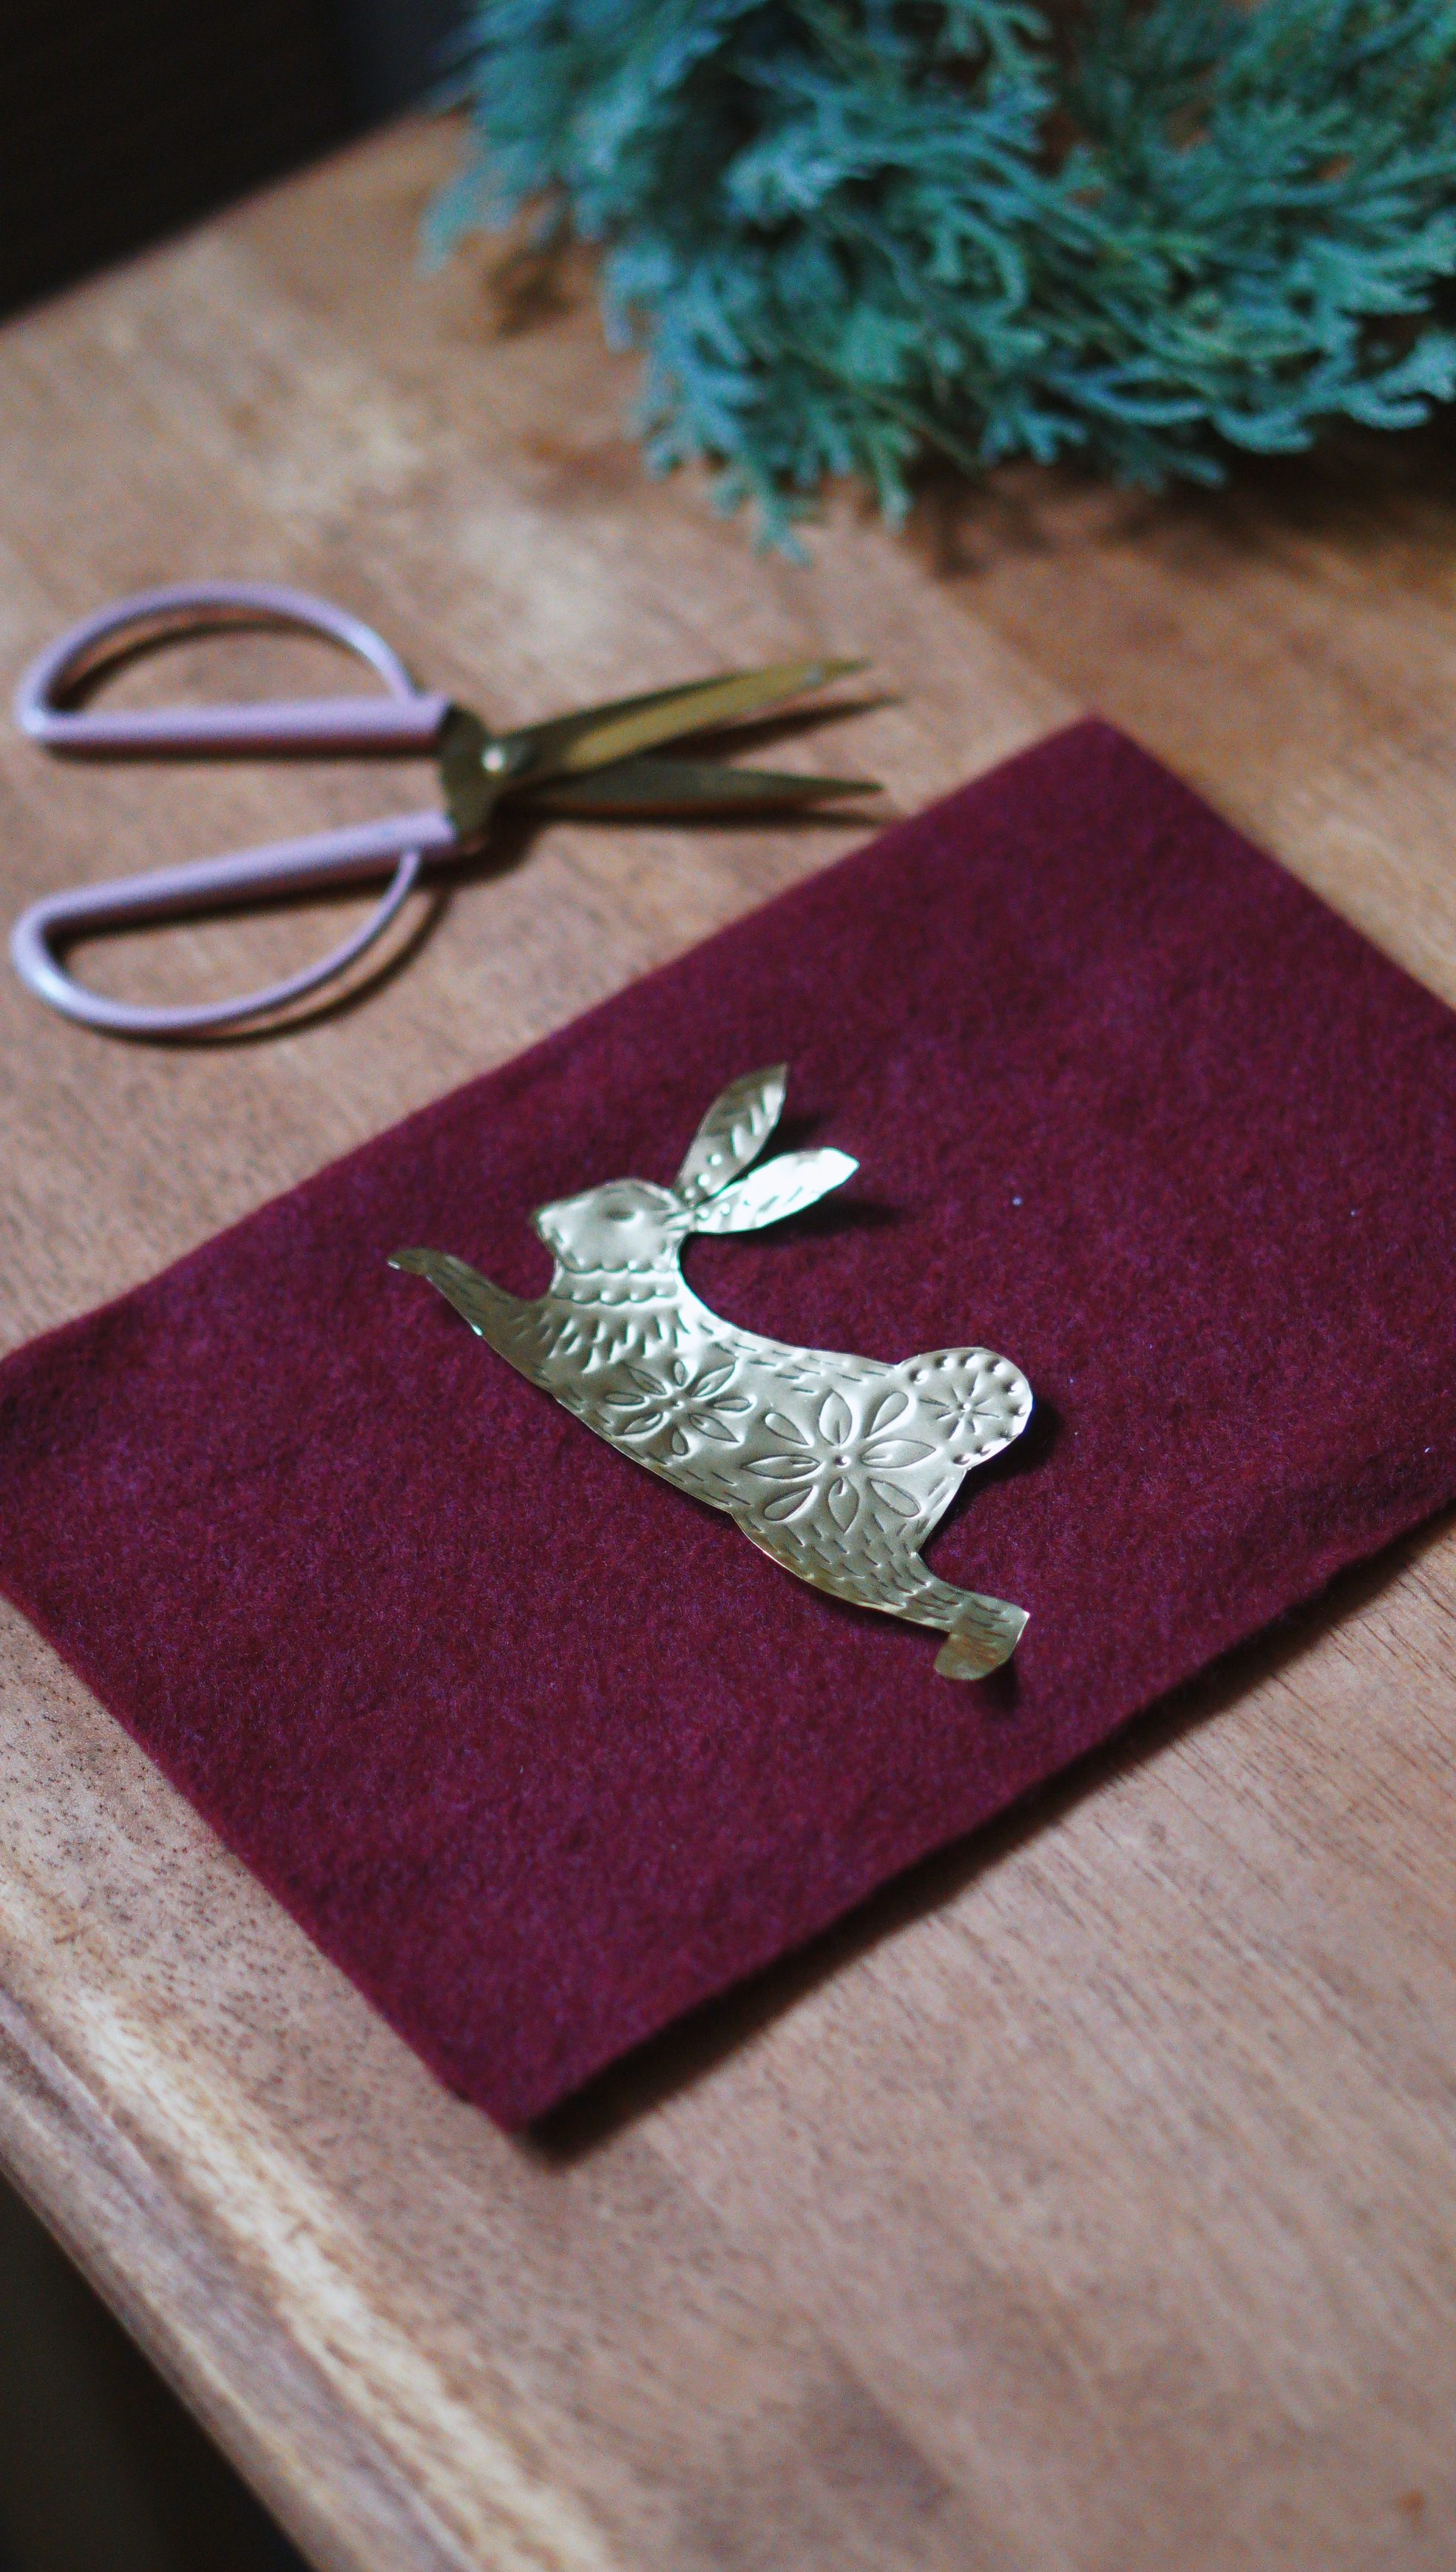
- Scissors (to cut shapes)
- Templates or stencils (for stars, moons, birds, and other shapes)
- Thin brass wire (for the mobile frame)
- Wire cutters and pliers (to shape and cut the frame)
- Fishing line or thin gold string (to hang the shapes)
- Hot glue gun (to secure parts of the frame if needed)
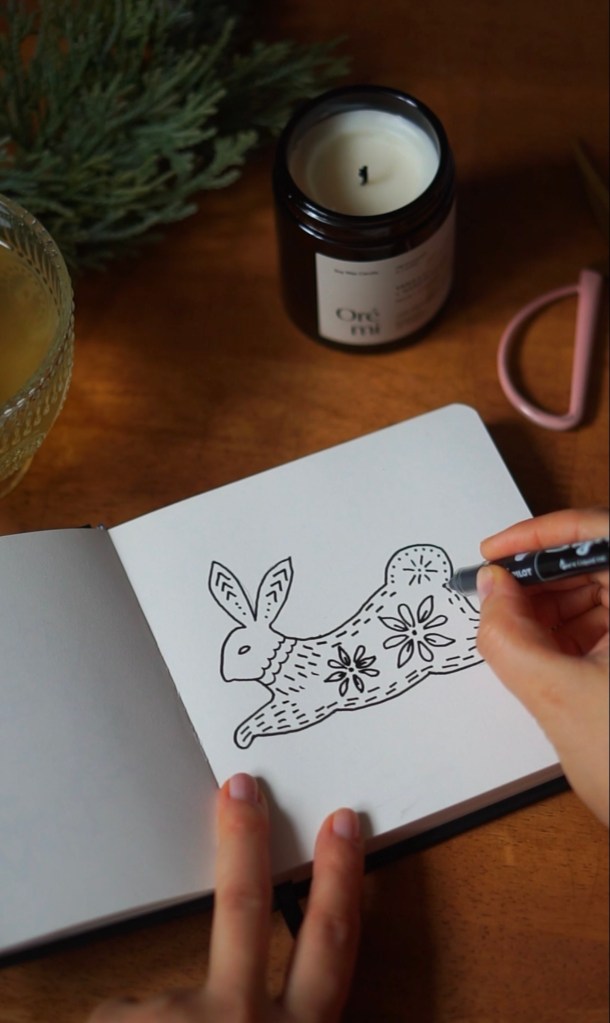
Step 1: Designing Your Shapes
Start by deciding on the shapes you want to include in your mobile. For a winter-inspired theme, consider celestial shapes like stars and moons, along with nature-inspired elements like leaves, birds, and small animals such as a rabbit.
If you’re not comfortable drawing these shapes freehand, you can download my FREE templates here! Once you’ve decided on the shapes, print or trace them onto your metal sheet or foil paper.
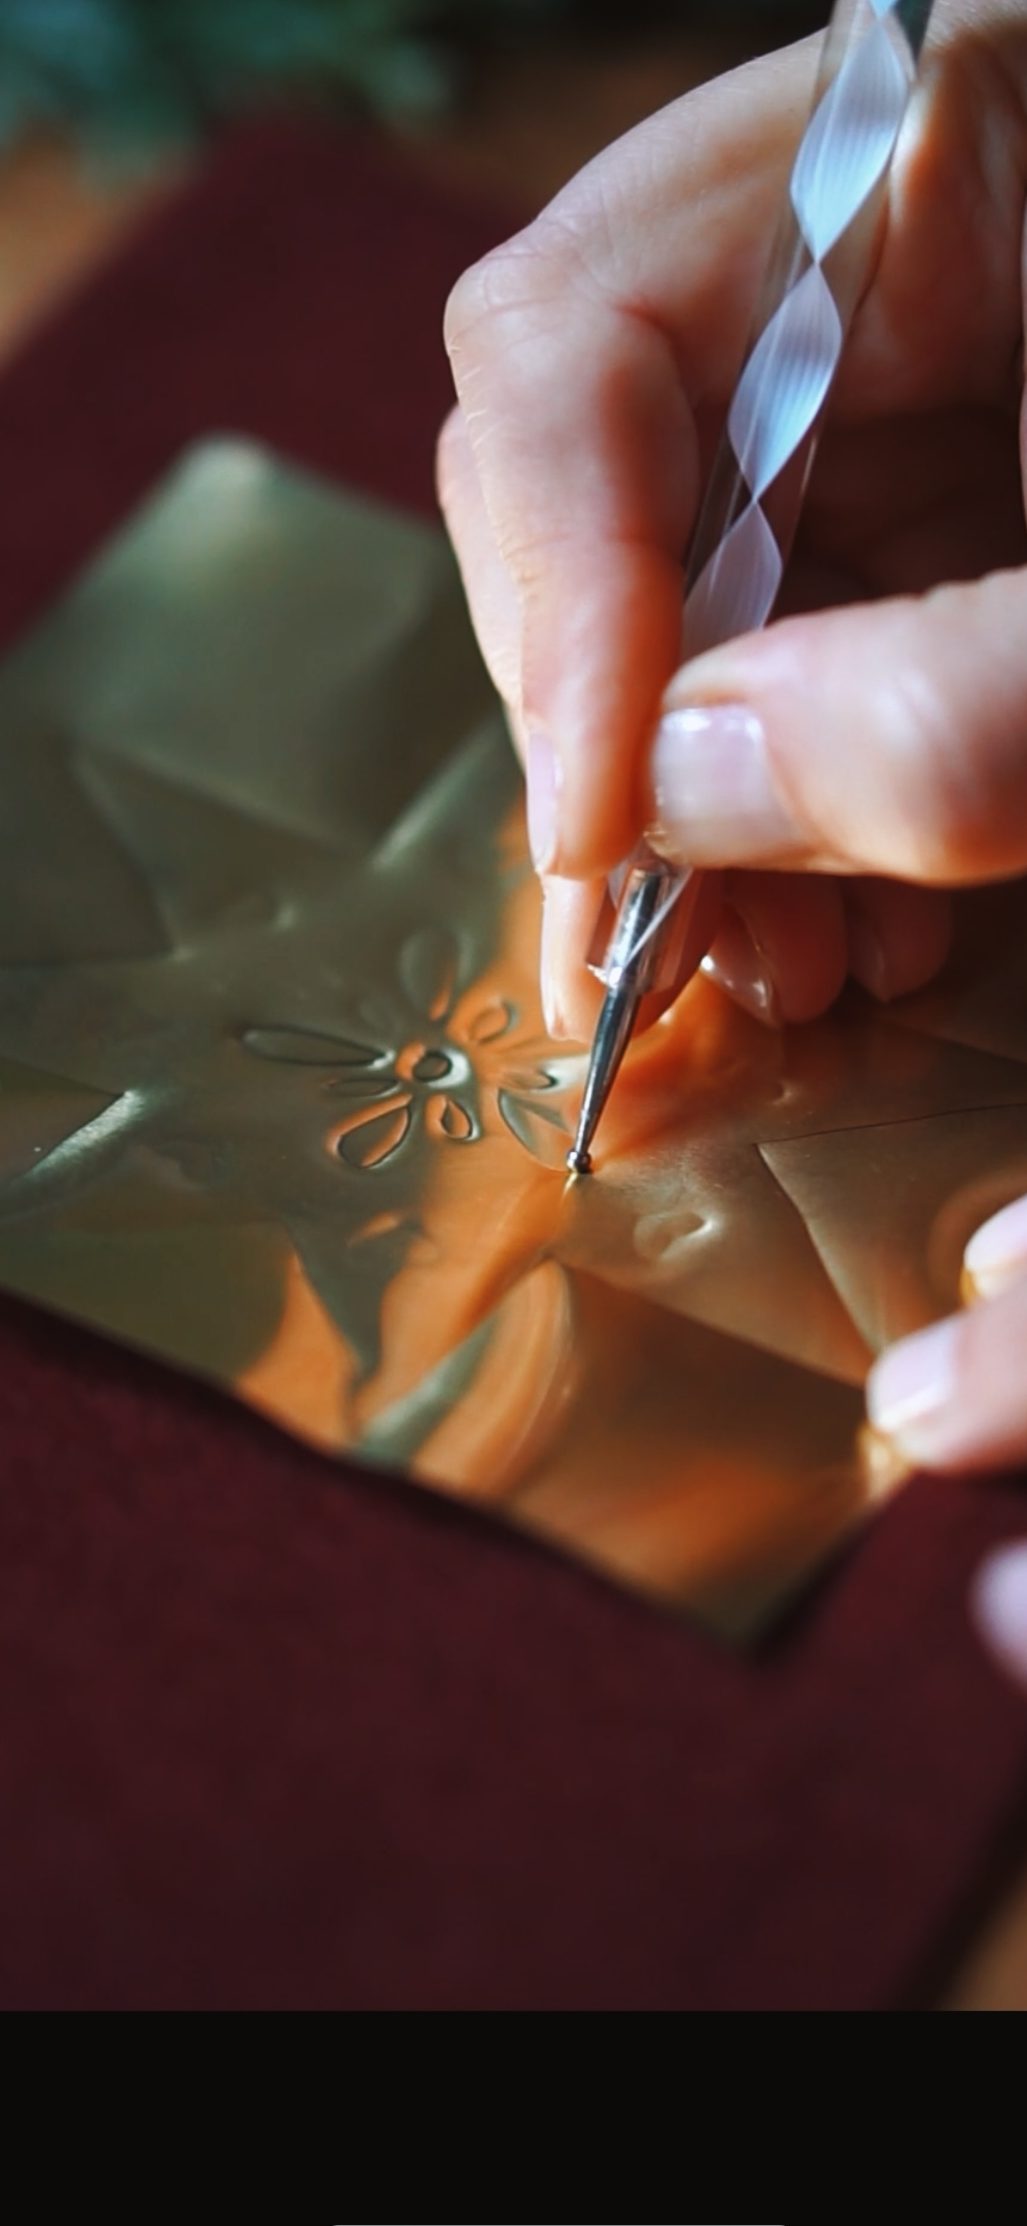
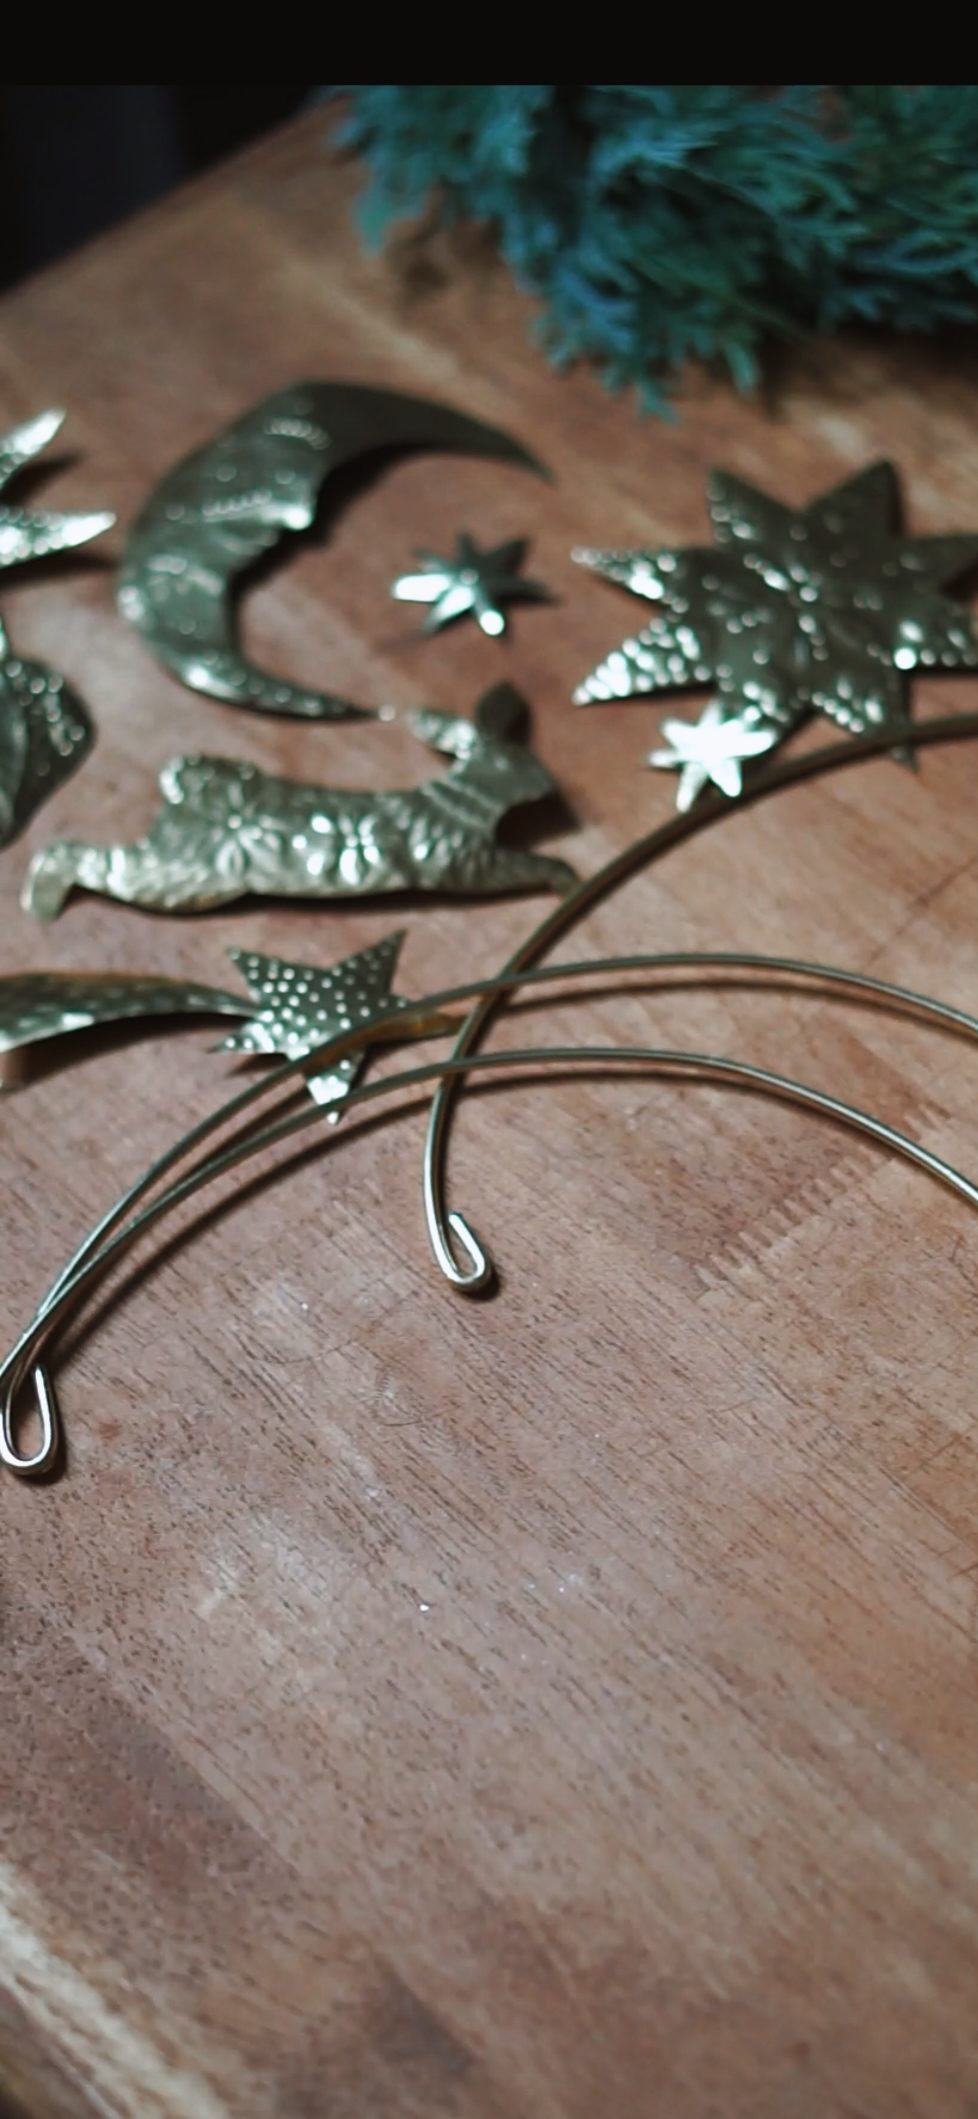
Step 2: Embossing (The Most Satisfying Part)
This is where the magic happens! Using an embossing stylus, I traced patterns onto each shape. For the moon, I etched tiny craters; for the stars, I added rays to make them shine brighter. I even gave the rabbit a bit of “fur” texture—it was fiddly, but worth it!
This part took time, but it was so meditative. I found myself getting lost in the process, feeling connected to each piece as I added detail after detail. If you’re new to embossing, start with simple lines and work your way up to more intricate patterns. It’s all about patience, and honestly, it was a lovely break from the holiday rush.
Step 3: Building the Frame
The frame was a bit of a puzzle. I used thin brass wire to create three cascading arches, which would hold the shapes at different levels. My goal was to make the mobile feel balanced but not too “perfect”—I love a bit of asymmetry for that handmade charm.
I twisted the ends into loops for attaching the fishing line, making sure each arch could hold the weight of the shapes without bending. This step took some trial and error, especially since I wanted the shapes to hang at just the right height to catch the light.
Step 4: Attaching the Shapes
Once your frame is ready, it’s time to attach the embossed shapes. Cut pieces of fishing line or gold string to varying lengths to create a dynamic, layered look. Attach one end of the line to the top of each shape using a mini hole punch if necessary, and secure the other end to the mobile frame.
Ensure that each shape has enough room to move slightly without getting tangled with the others. You want the mobile to have a balanced, airy feel, with each element able to catch and reflect light as it gently sways.
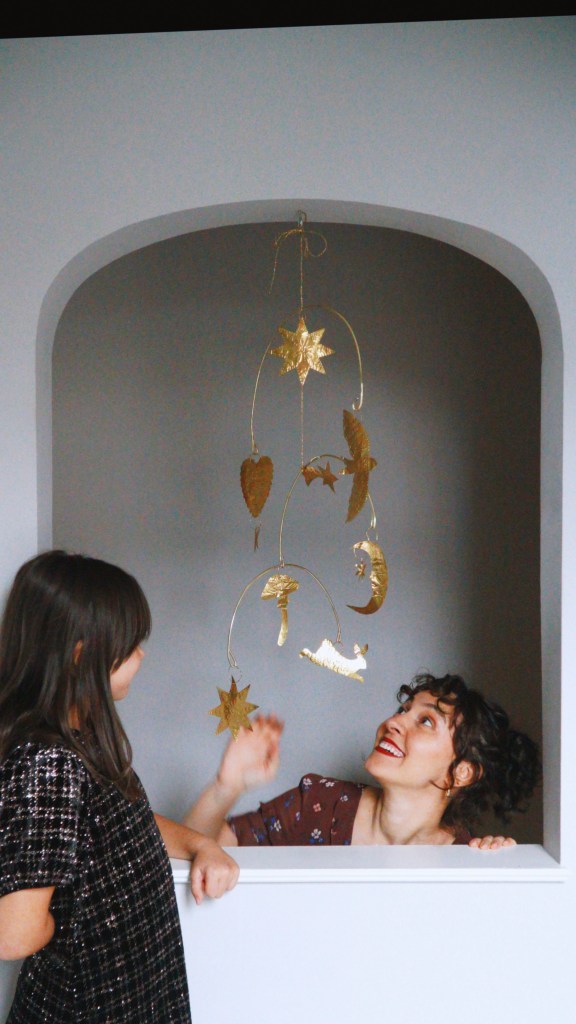
Hanging Your Mobile
Find the perfect spot for your mobile—ideally near a window where it can catch natural light. The movement and glow of the embossed gold shapes will bring warmth and charm to any room. I hung mine near an archway in our new home, where the light hits it just right, making it feel magical.
Why I Love This Mobile (and Why You Will Too)
Yes, this project took time—more than I expected. But looking at the mobile now, I wouldn’t change a thing. It feels like a piece of me is captured in each shape, each line and detail. And I love that this mobile is more than just decor; it’s a little bit of nature, a bit of whimsy, and a lot of heart.
Making this mobile reminded me of the joy of crafting with intention, of creating something that adds beauty and meaning to our home. It’s a piece I’ll cherish, not just for the holidays, but as a reminder of what we can make with our own hands.
Some Tips If You’re Inspired to Make Your Own
- Take your time with embossing: Let yourself enjoy the process; it’s not about perfection but about creating something unique.
- Use lightweight materials: They’re easier to work with, and the shapes will move more freely.
- Embrace “mistakes”: Sometimes, a little extra shimmer or an asymmetrical shape can make the piece feel even more special.
- Find the right spot: Hang your mobile near a window or somewhere with soft light—it’s amazing to watch it come to life.
I hope this project inspires you to make something beautiful and meaningful for your own home. Whether it’s a mobile or something entirely different, there’s such joy in creating decor that speaks to who you are. And with free templates, you’re just a few clicks away from starting your own magical project.


Leave a comment